Widget for getting tokenized bank account details
Use the widget to save bank account details with Bank 131.
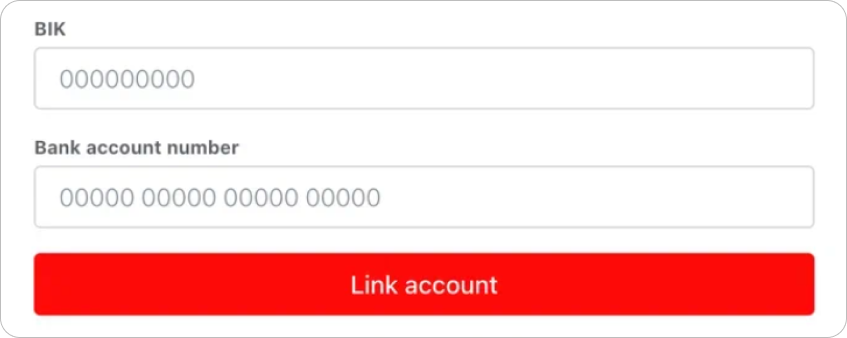
What the widget looks like
Code example: a page with the widget
<!DOCTYPE html>
<html lang="ru">
  <head>
    <meta charset="utf-8" />
    <title>Widget for bank account tokenization</title>

    <meta name="viewport" content="width=device-width,initial-scale=1" />
    <meta name="format-detection" content="telephone=no" />

    <!-- Connecting script and widget styles -->
    <link href="https://widget-demo.bank131.ru/bank-account-tokenizer.css" rel="stylesheet" />
    <script src="https://widget-demo.bank131.ru/bank-account-tokenizer.js" defer></script>
  </head>
  <body>
    <main>
      <div id="bank131-bank-account-tokenizer"></div>
    </main>

    <script>
      document.addEventListener('DOMContentLoaded', function () {
        if (!window.Bank131BankAccountTokenizer) {
          return;
        }

        const bankAccountTokenizer = new Bank131BankAccountTokenizer(
          publicToken,
          {
            /*
            // An example of widget text settings
            texts: {
              // Label field Account number. The default is "Account number".
              bankAccountLabel: '',
              // BIC field label. The default is "BIC".
              bikLabel: '',
              // Account linking button. The default is "Link account".
              submitButtonLabel: '',
              validationErrors: {
                invalidBankAccount: '',
                invalidBankAccountLength: '',
                invalidBikLength: '',
                isRequired: ''
              },
            },
            styles: {
              bankAccountTokenizer: {
                // Styles for the inline input field container.
                inputContainer: { background: 'cornsilk' },
                // Styles for the input field.
                inputField: { background: 'cornsilk' },
                // Styles for the input field when focused.
                inputFieldIsFocused: { background: 'white' },
                // Styles for the error input field.
                inputFieldIsInvalid: { background: 'red' },
                // Styles for the input field placeholder.
                inputFieldPlaceholder: { color: 'blue' },
              },
            }
            */
          }
        );

        bankAccountTokenizer.onReady = function () {
          console.log('Bank account tokenizer is ready.');
        };

        bankAccountTokenizer.onTokenizationStart = function () {
          console.log('The tokenization process was started.');
        };
        bankAccountTokenizer.onTokenizationFail = function () {
          console.log(
            'The tokenization process was finished with an error',
            error
          );
        };
        bankAccountTokenizer.onTokenizationSuccess = function (result) {
          console.log(
            'The tokenization process was successfully finished.',
            result
          );
        };

        bankAccountTokenizer.render();
      });
    </script>
  </body>
</html>
How the widget operates
You embed the widget on your website. The user enters their account details, Bank 131 stores them in its system, and returns a payout token to you.
You can save this token and use it for future payouts to the same account. This is secure.
You can find out information about a token using the token/info method.
Initializing the widget
Step 1. Get a public token
Send a request to Bank 131 to create a token (token), specifying the widget type as tokenize_widget. The response will contain your public token.
Step 2. Set up scripts and CSS styles
Include the widget's script (JS) and styles (CSS). The URLs differ between testing and live operations:
<!-- In test environment -->
<link href="https://widget-demo.bank131.ru/bank-account-tokenizer.css" rel="stylesheet" />
<script src="https://widget-demo.bank131.ru/bank-account-tokenizer.js" defer></script>
<!-- For real operations -->
<link href="https://widget.bank131.ru/bank-account-tokenizer.css" rel="stylesheet" />
<script src="https://widget.bank131.ru/bank-account-tokenizer.js" defer></script>
After linking the script to the page, the Bank131BankAccountTokenizer class will appear in the global scope.
Step 3. Add a container
Add a container with a unique ID to place the widget on the page:
<div id="bank131-bank-account-tokenizer"></div>
Step 4. Create an instance of the class
Pass the public token to the Bank131BankAccountTokenizer class constructor:
const bankAccountTokenizer = new Bank131BankAccountTokenizer('public token');
You can also pass settings for widget texts and styles for the input field to the constructor:
const bankAccountTokenizer = new Bank131BankAccountTokenizer(
    'public token',
    {
        texts: {
            // Label field Account number. The default is "Account number".
            bankAccountLabel: '',
            // BIC field label. The default is "BIC".
            bikLabel: '',
            // Account linking button. The default is "Link account".
            submitButtonLabel: '',
            validationErrors: {
              invalidBankAccount: '',
              invalidBankAccountLength: '',
              invalidBikLength: '',
              isRequired: ''
            },
        },
        styles: {
            bankAccountTokenizer: {
            // Styles for the inline input field container.
            inputContainer: { background: 'cornsilk' },
            // Styles for the input field.
            inputField: { background: 'cornsilk' },
            // Styles for the input field when focused.
            inputFieldIsFocused: { background: 'white' },
            // Styles for the error input field.
            inputFieldIsInvalid: { background: 'red' },
            // Styles for the input field placeholder.
            inputFieldPlaceholder: { color: 'blue' },
        },
    }
);
The following key event handlers can be used:
bankAccountTokenizer.onReady = function () {
    // Handler for the widget's readiness event.
};

bankAccountTokenizer.onTokenizationStart = function () {
   // Event handler that occurs when the tokenization process starts.
};

bankAccountTokenizer.onTokenizationFail = function () {
   // Event handler that occurs when the tokenization process fails.
};

bankAccountTokenizer.onTokenizationSuccess = function (result) {
   // Event handler for the successful completion of the tokenization process.
};
Step 5. Display the widget
Call the render() method:
bankAccountTokenizer.render();
How to make a payout with the widget ot by token >