User actions
Each user in the Dashboard has one or more roles. A role defines which sections and actions are available to the user. Three roles are available: Admin, Manager, Support.
-
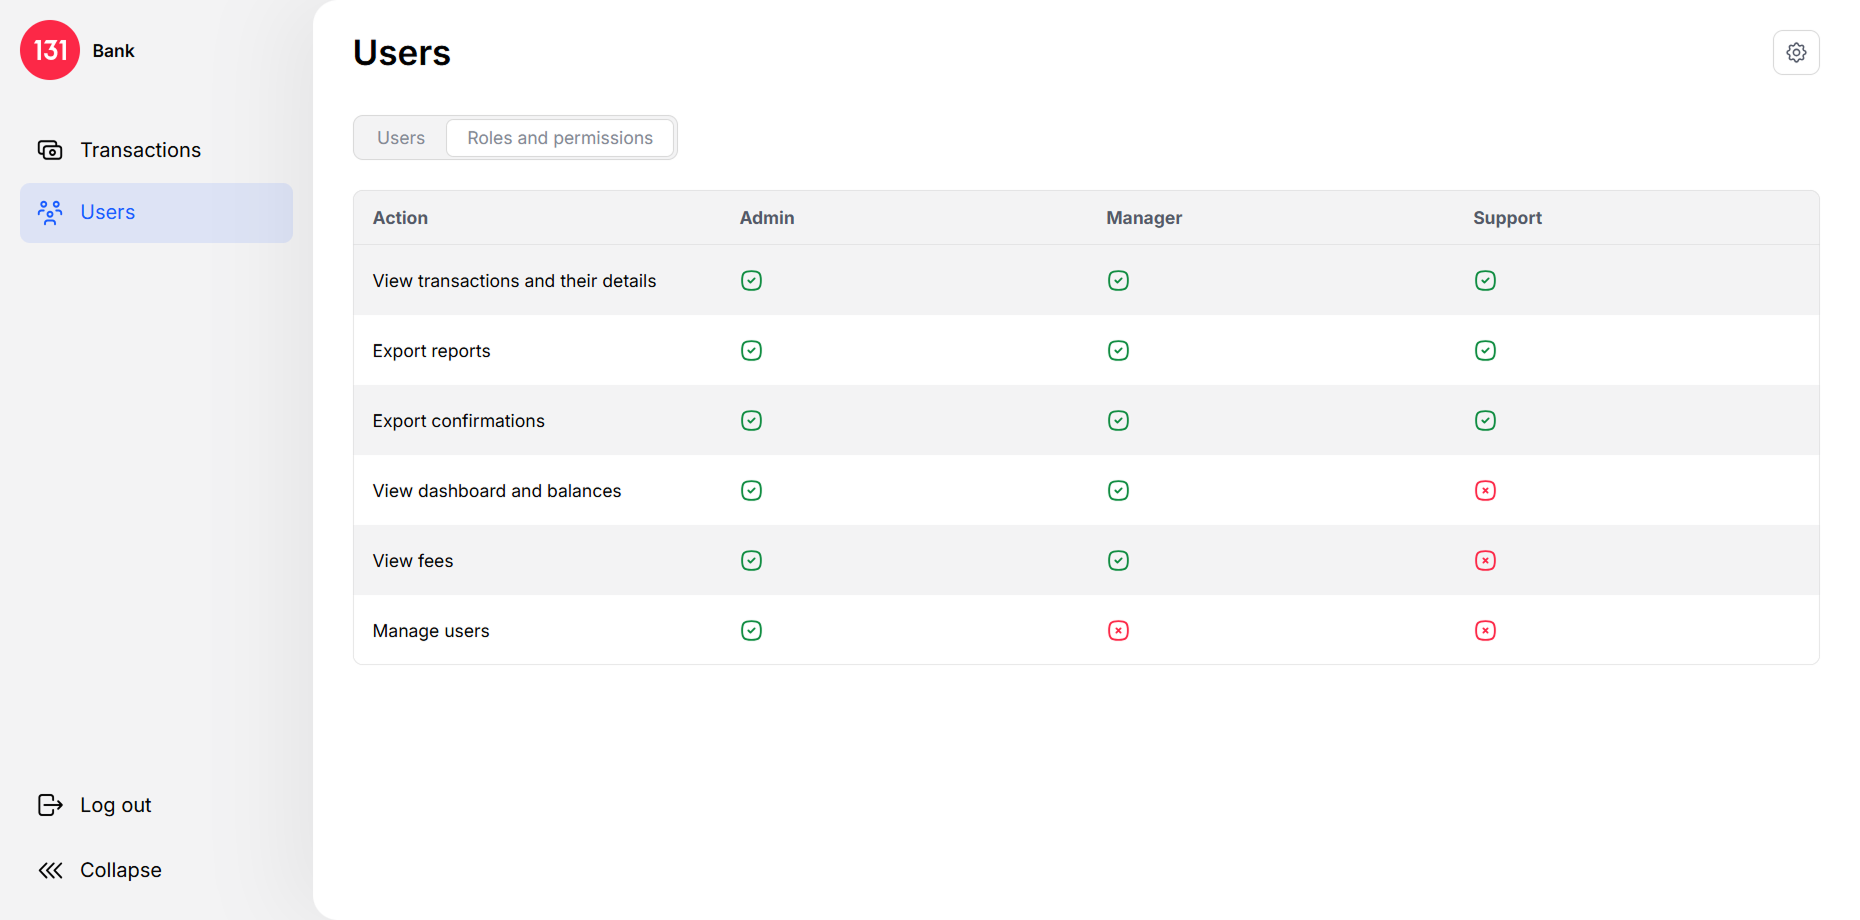
Admin—manages users and has access to all sections.
-
Manager—works with transactions, reports, balances, and commissions but cannot manage users.
-
Support—designed for partner support—сan view transactions, export reports and confirmations, but cannot see balances or commissions and cannot manage users.
Only users with the Admin role can manage users. If you do not see the Users section in the menu, you have a different role. The Admin role can be assigned to only one user. You cannot assign another administrator through the Dashboard interface. If you need to transfer the role to another employee, contact support.
Administrators can do the following actions with other users:
To start managing users, select the Users section on the left panel.
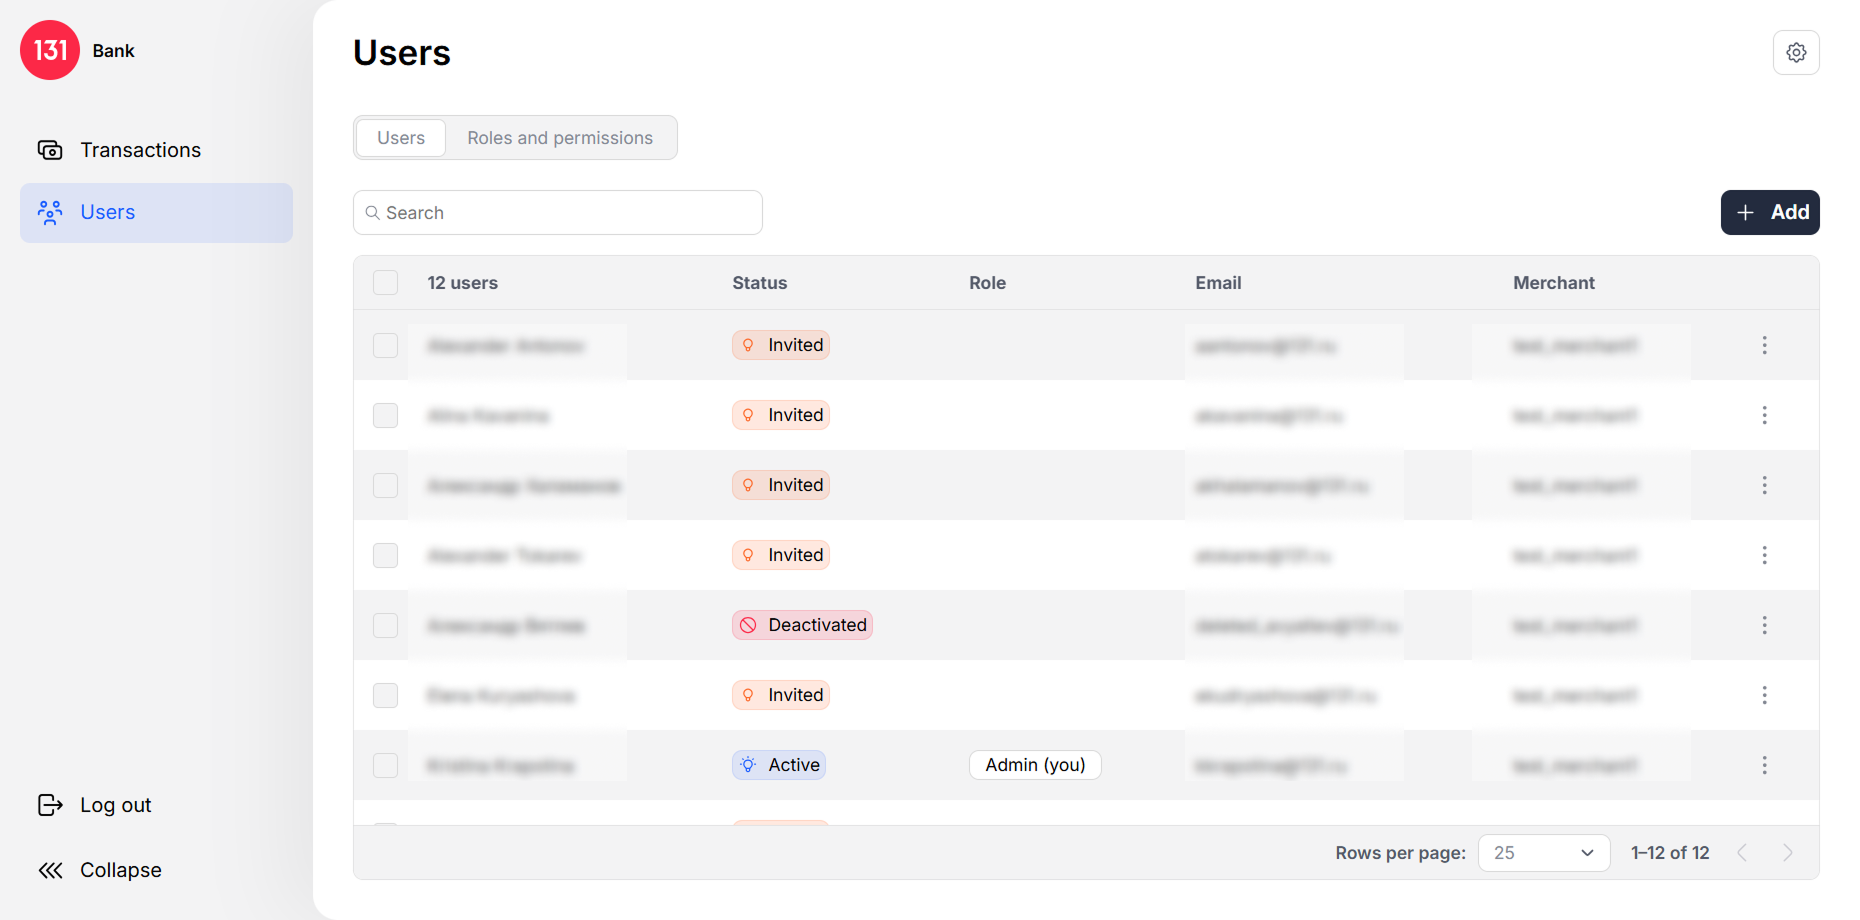
On the page that opens, you will see two tabs: Users and Roles and permissions.
The Users tab displays the list of all users and their information:
- total number of users
- first and last name
- user status
- Active—the user has accepted the invitation and can work in the Dashboard
- Invited—invited user who has not yet accepted the invitation
- Deactivated—the user's access is blocked
- user role: Manager, Support
- user email address used during registration
- partner company the user has access to
To find a user by first name, last name, or email, use the search bar above the table.
The Roles and permissions tab shows actions available to each role. For example, Manager can view balances and commissions, while Support cannot. Both roles allow viewing transactions and exporting reports.
Adding a user
To add a user, follow these steps:
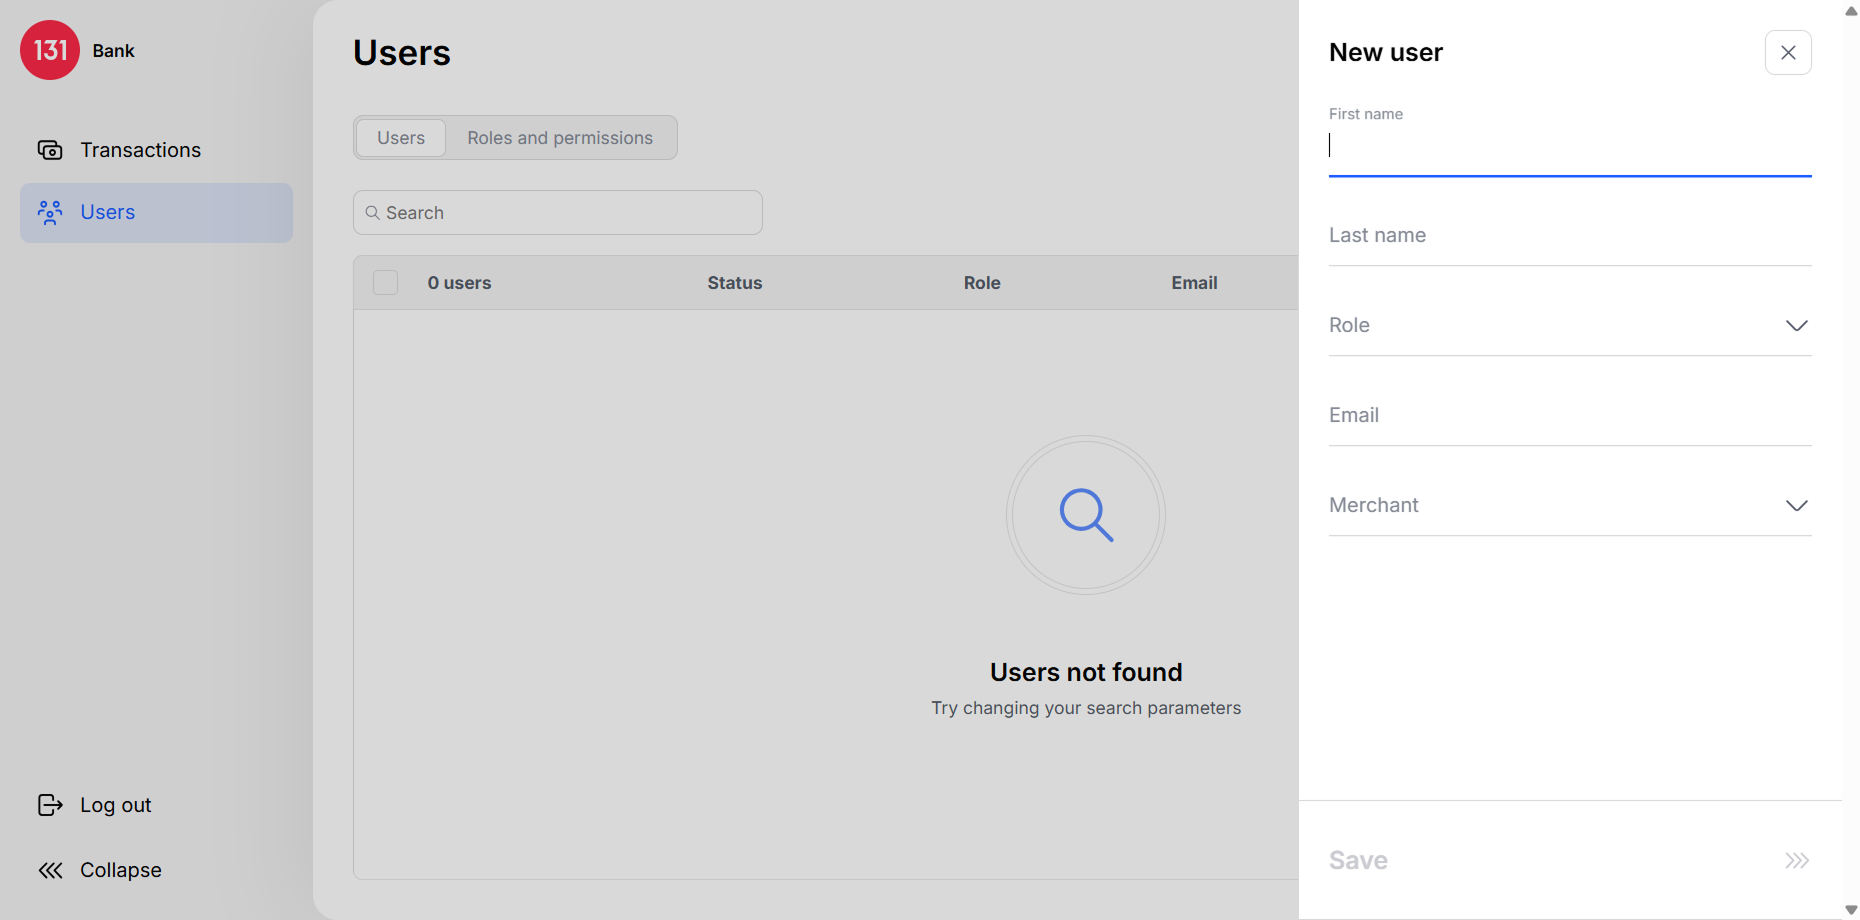
- Click the Add button above the users table.
- In the window that opens, enter the new user's first and last name, select one or more roles, specify their email for sending the invitation, and select partners they will have access to.
- Click Add . The user will appear in the table with the Invited status. When the user accepts the invitation, the status will change to Active.
Editing a user
To edit a user, follow these steps:
- Click the user in the table.
- In the window that opens, change the necessary information: first name, last name, role, partner. The email cannot be changed.
- Click Save. The user card data will be updated.
Blocking and deleting a user
You can block or delete a user in three ways:
- Select one or more users by checking the checkbox next to their name in the table. Then click Block or Delete on the panel that appears.
- Click the three dots in the user row in the table and select Block or Delete.
- Open the user card, click Actions, and select Block or Delete.
| Action | What happens | Can be restored |
|---|---|---|
| Block | The user remains in the table with the Deactivated status, access is blocked | Yes |
| Delete | The user is removed from the table, access is revoked | No |
Access recovery
This action is only available to users in the Deactivated status. It restores the user's access. The user status in the table changes from Deactivated to Active.
To restore a user's access, follow these steps:
- Click the three dots in the user row in the table.
- In the menu that opens, select Restore.
- A confirmation window will open. Click the Restore button.
Re-inviting a user
This action is only available to users in the Invited status. If you invited a user but the email was lost or needs to be sent to a different address, you can resend the invitation.
Follow these steps:
- Click the three dots in the user row in the table.
- In the menu that opens, select Re-invite.
- A confirmation window will open. Click the Send button. The user will receive a new invitation email at the specified address.
Password reset
This action is only available to users in the Active or Invited status. If a user forgot their password and cannot log in to the Dashboard, you can reset their password. There are two ways:
- Open the user card, click Actions at the top, and select Reset password.
- Click the three dots in the user row in the table and select Reset password.
A confirmation window will open. Click the Reset button. The user will receive an email with a temporary password at the specified address. After clicking the link in the email, they will be asked to set a permanent password.